Surely, life will teach you more than a photograph will. But…
most of us use them for reference, so let’s take a look at the differences;
You will always see more true color from life than you will from a photo. If it’s possible to do a quick sketch or color study on site, this can be very helpful when it comes time to work from the photograph.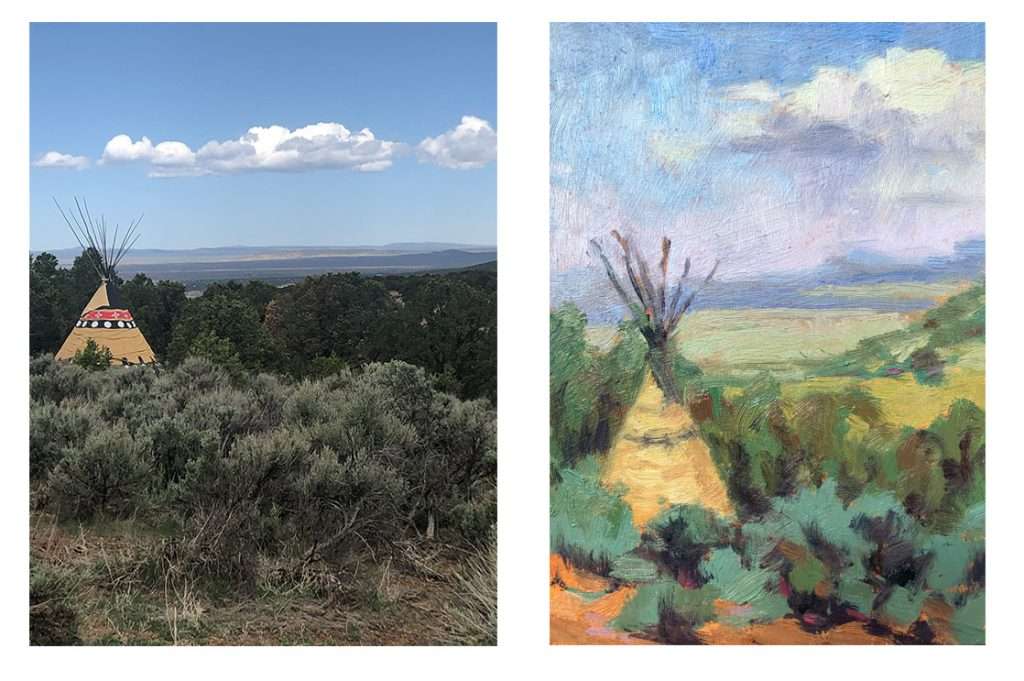 The more you paint from life, the better you become at seeing color, shapes, value… You become a better painter, much more quickly. Then, when you are presented with the challenge of working from a photograph, you understand how to translate it because you can more easily guess what I might be like in real life. You realize that the photograph is simply for reference, and your job as a painter is still to build the best painting possible, rather than copying what the camera’s eye shows you. I find this particularly true when I paint a portrait from a photograph. I know that the photo will not show me the rosy cheeks or the pink lips, and that if I want the portrait to be “alive” I need to make those adjustments. In many cases, I will want to exaggerate those warm tones to bring a nose forward, regardless of how the photograph reads.
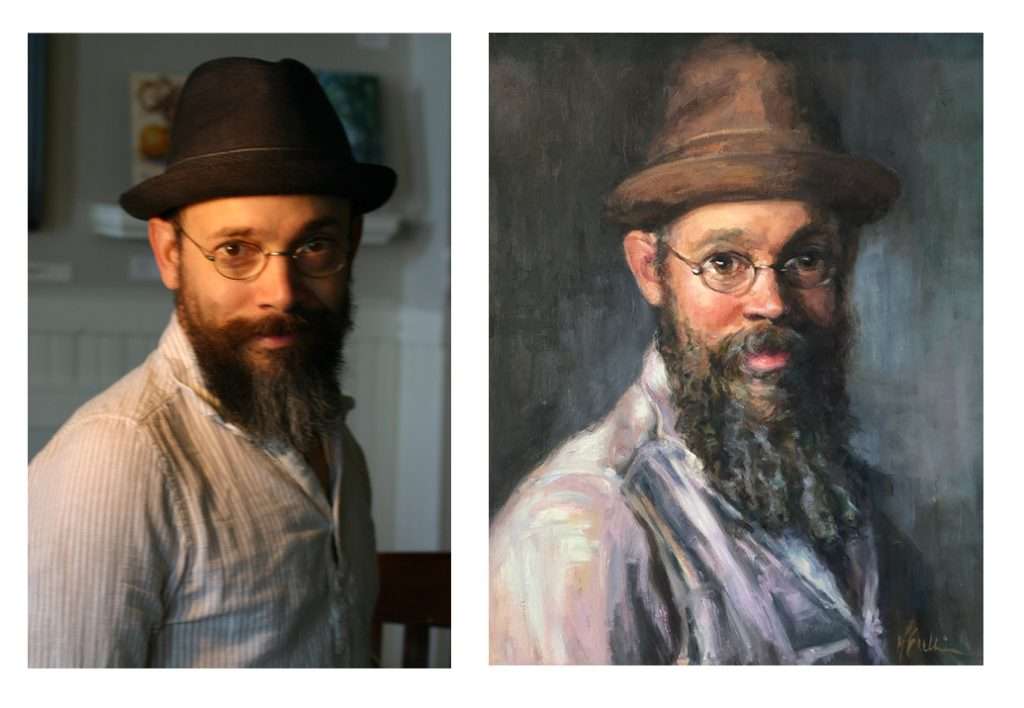 The cameras eye will sometimes help you crop and help you see multiple compositions, but it’s best to learn how to do that with your own eye. In the image below you can see how I made several changes to the photo to suite my compositional fancy. When I was in Uganda I saw this daily community to the market so many times and it always struck me as so beautiful, but it was not until the day we were headed home that I was able to capture it. I got the gist of the main focus but changed the rest of it. I moved trees. I corrected the color of the blown out sky. I shifted my main focus to the left. Because I paint so often from life it was relatively easy to makeup the landscape off to the right that was not in the shot at all.
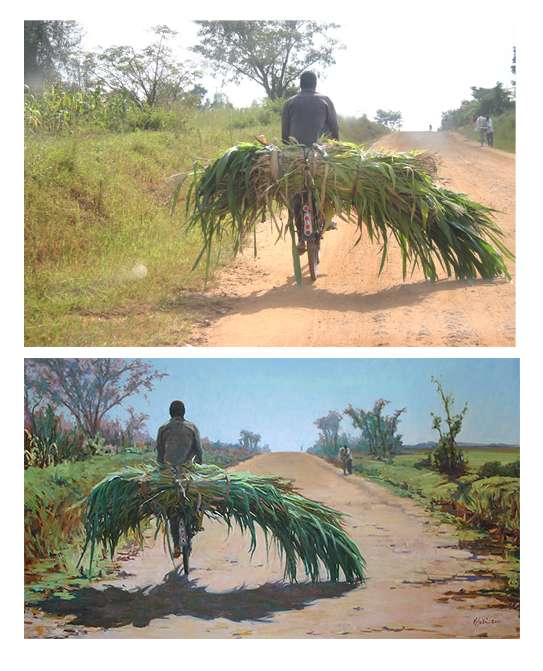
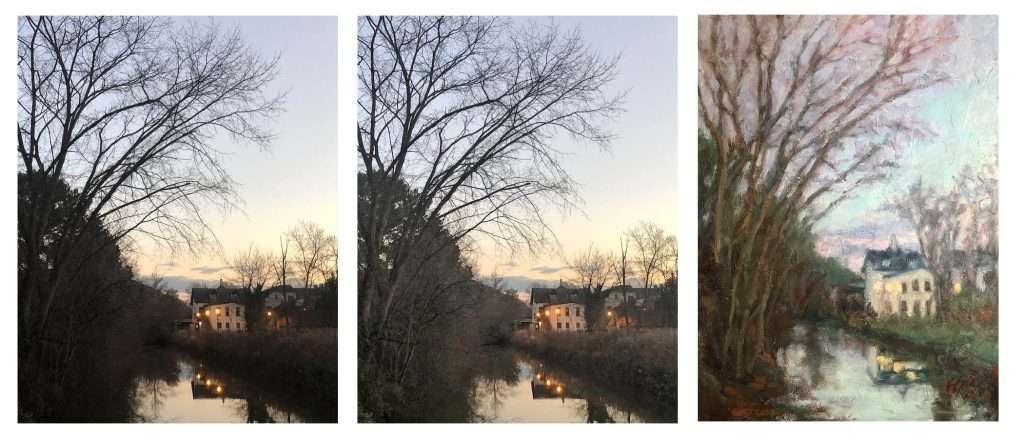
The shadows in a photograph will always appear darker than they do in life. If you use some kind of photo editing software you can lighten the shadow areas which will help you see more of what’s in there. I use photoshop: you can go to Image – Adjustments – Shadows/Highlights, and toggle up the shadows to see the difference. You can see below the difference in the adjusted photographs, as well as the compositional choice to make the building slightly larger.
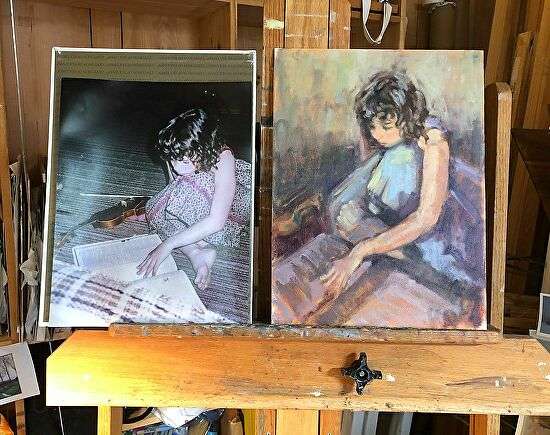
And last but certainly not the least – choose what is important to keep in the piece, and what you can leave out. A man came to the studio for a private lesson. He had a photograph that was very meaningful to him. It represented a moment from his daughters childhood that he really wanted to capture in a painting, and he was really struggling with it. The photograph has so many issues that to merely copy it would have never resulted in a good painting. To demonstrate how we might move through these issues I decided to just start from scratch. In a three hour session we went from Notan, line, value, color, texture, and edges. It was like painting on speed – but it resulted in a sweet little painting. We shifted the focal point of the girl to be more prominent, we lighted the area behind her dark hair so she wouldn’t get lost in it, we tucked in that awkward foot and covered is with her nightgown, we changed the color of her nightgown to create more harmony, we suggested the book and the violin – it has what it needs and it’s far less complicated. Also notice the pink cheeks, which are not in the photo at all.